
Hello MBT Fans,
It's Tuesday and you know what that means here at MB's Treasurista, that's right! Another Teach Me Tuesday Tutorial. Today's craft highlights some very unique and imaginative uses of the Magic Stamp? We will also share 2 gorgeous journal pages by Pernilla Svalborg! So we've got journal pages, stamping, the Magic Stamp and a tutorial! Plus we have a winner to announce for this week's blog contest! Could this day get any better?!
And now it's time to announce our contest winner chosen by you...


Lydia
Congratulations, Lydia! Please send me a confirmation email with your shipping address at mbstreasurista@gmail.com, to claim your prize.
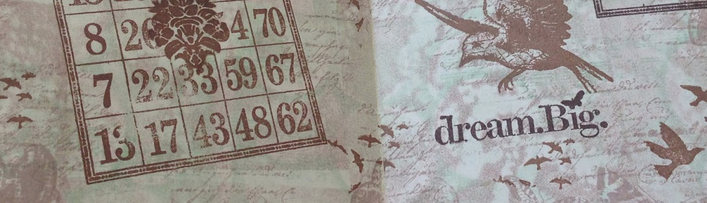
Here is what Pernilla has to say about how she created these beautiful journal pages:
Today I have a little bit of art journaling to show you - now, I'm a beginner in art journal and mostly admire others' work rather than do my own, but I'm hoping I'm learning. So far, it's mainly been a bit of paint or spray and some stamping. Since the discovery of modeling paste and The crafter's workshop stencils... What can I tell you, it's a whole new world opening. But I wish for the pages to stay flat and less bulky, so I thought why not try to add depth with my new magic stamp from MB's Treasurista. I had the best time trying to come up with impressions and I really liked the chain and the coins. But how would I incorporate those in some art journaling?
Anyhow, without further due - behold the result:)

Now, I stamped the heck out of the poor background. But I just couldn't help myself:)
I was so please with the result, I got so much seemed going on at the same time and still the page is completely flat!

Ink: Adirondack dye ink in espresso, hazelnut and juniper; archival ink in coffee
Stamp: Magic stamp! Vintage finds, Teresa Collins, Kaisercraft old lamppost and butterflies, Tim Holtz red rubber cling
Products from MB's Treasurista store:
But, don't forget that Misty will custom make you an order if you can not find what you're looking for. You might be familiar with the Tim Holtz catalog, where you will find both the ink and the red rubber cling stamp sets. But she is also able to get you Kaisercraft - thus basically able to provide you with every product I used to create this art journal page. I'm sure she can even get you an art journal if you don't have one already - LOL!
Using the Magic Stamp Tutorial:

I'm here to show you how to work the magic stamp.
It may not look much, but it's so versatile:)
The
possibilities are endless, you will basically be able to make your own
stamp with what ever you're in the mood for... or what ever material you
have available.
Let me tell you how it works:
Heat - The first thing you must do is to heat the foam. You will see the foam react to the warmth and be more porous.

Press - after it's heated, gently press it to a surface of your choice. But it should have some kind of structure to it. Think beads, coins, linen texture or even cooking rise. You can also try chains or gears, anything that will leave an impression in the foam. Also remember that the stamped image will be reversed.


Stamp - now it works like any foam stamp as usual. Just ink it with your ink of choice, I used dye ink from adirondack. I found that I liked it better to rub or brush the ink pad against the stamp rather than to tap it as I normally do.


Clean - Just as you would with any normal stamp, just clean it - here I used a baby wipe. No either you keep it like this and use it again and again and again or until you wish to make a new stamp.

Heat again - if you reheat the foam, the stamp will return to it's original shape and you can make another impression. That's the magic!


As it's very inexpensive you could easily afford having a number of your own personal stamps, but also as it's so versatile, the value for money is unbelievable :D


So I hope you give it a try, let me know if you have any questions and I will try my best to help you.
Please visit MB's Treasurista to buy your own magic stamp and more.
What beautiful journal pages and great tutorial. We hope you all had a lot of fun on today's blog! We want to thank Pernilla for her amazing work and tutorial! We would also like to thank Lydia and everyone else who played along with us for the contest. We hope that today's creation will inspire you to create and try out the magic stamp for yourself! Please come back and join us tomorrow for more amazing craft inspirations and fun ideas!
We always encourage you to post your creations to our Facebook page or Craft Community! We'd love to see what you've been creating with MB's Treasurista!
MB's Treasurista Facebook
"Creating the Crafty Life" Craft Community
Happy Tuesday,
Your Friends at MB's Treasurista
like this......going to try it.
ReplyDeletewhat kind of foam should I use???
tfs
milissa
There is a stamp in MB's treasurista store that I used. I'm not sure if you can take any foam? If so, it must be heat resistant at least so it doesn't melt in your hand and you'll get hurt... It's not very expensive, you can start with one stamp, Misty ships very fast :) You might even be able to cut it in two:) Good luck!
Deleteomg, i won? im soo happy :)
ReplyDeletegreat tute. i think i have that foam somewhere....